
Git — Version Control with SourceTree
SourceTree is a free Git GUI client by Atlassian that lets you visualise and drive the full Git workflow without the command line. This guide walks through the complete feature branch cycle a developer follows when working in a team — from pulling the latest main to cleaning up after a merge.
1. Create a New Branch
Before starting any work, make sure your local main is up to date, then create a dedicated branch for your feature.
Pull main
Open SourceTree. Make sure you are on the main branch (click it in the left sidebar under Branches). Click the Pull button in the toolbar to fetch and merge the latest remote changes. This ensures your new branch starts from the most recent state of the project, avoiding conflicts later.
Create a new branch
Click the Branch button in the toolbar (or right-click main in the sidebar → Branch…).
Enter a descriptive name following your team’s convention:
feature/my-feature-with-a-descriptive-name
bugfix/null-pointer-on-login
hotfix/payment-timeout
A good branch name tells your teammates what the work is about before they open a single file. Make sure Checkout New Branch is checked, then confirm.
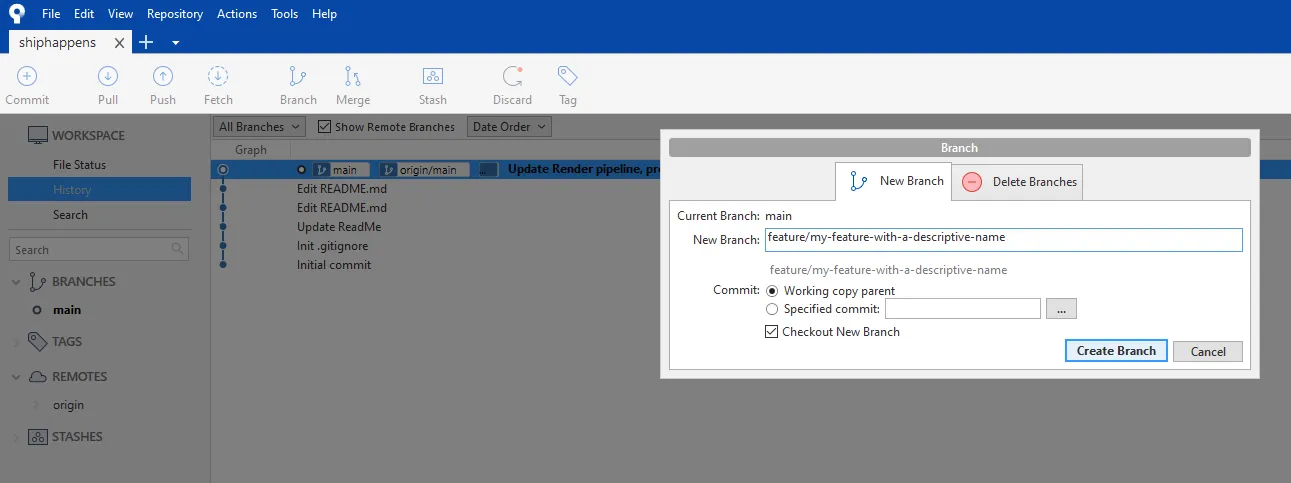
You are now on your feature branch. Any commits you make will stay isolated from main until you open a Merge Request.
2. Commit and Push Your Changes
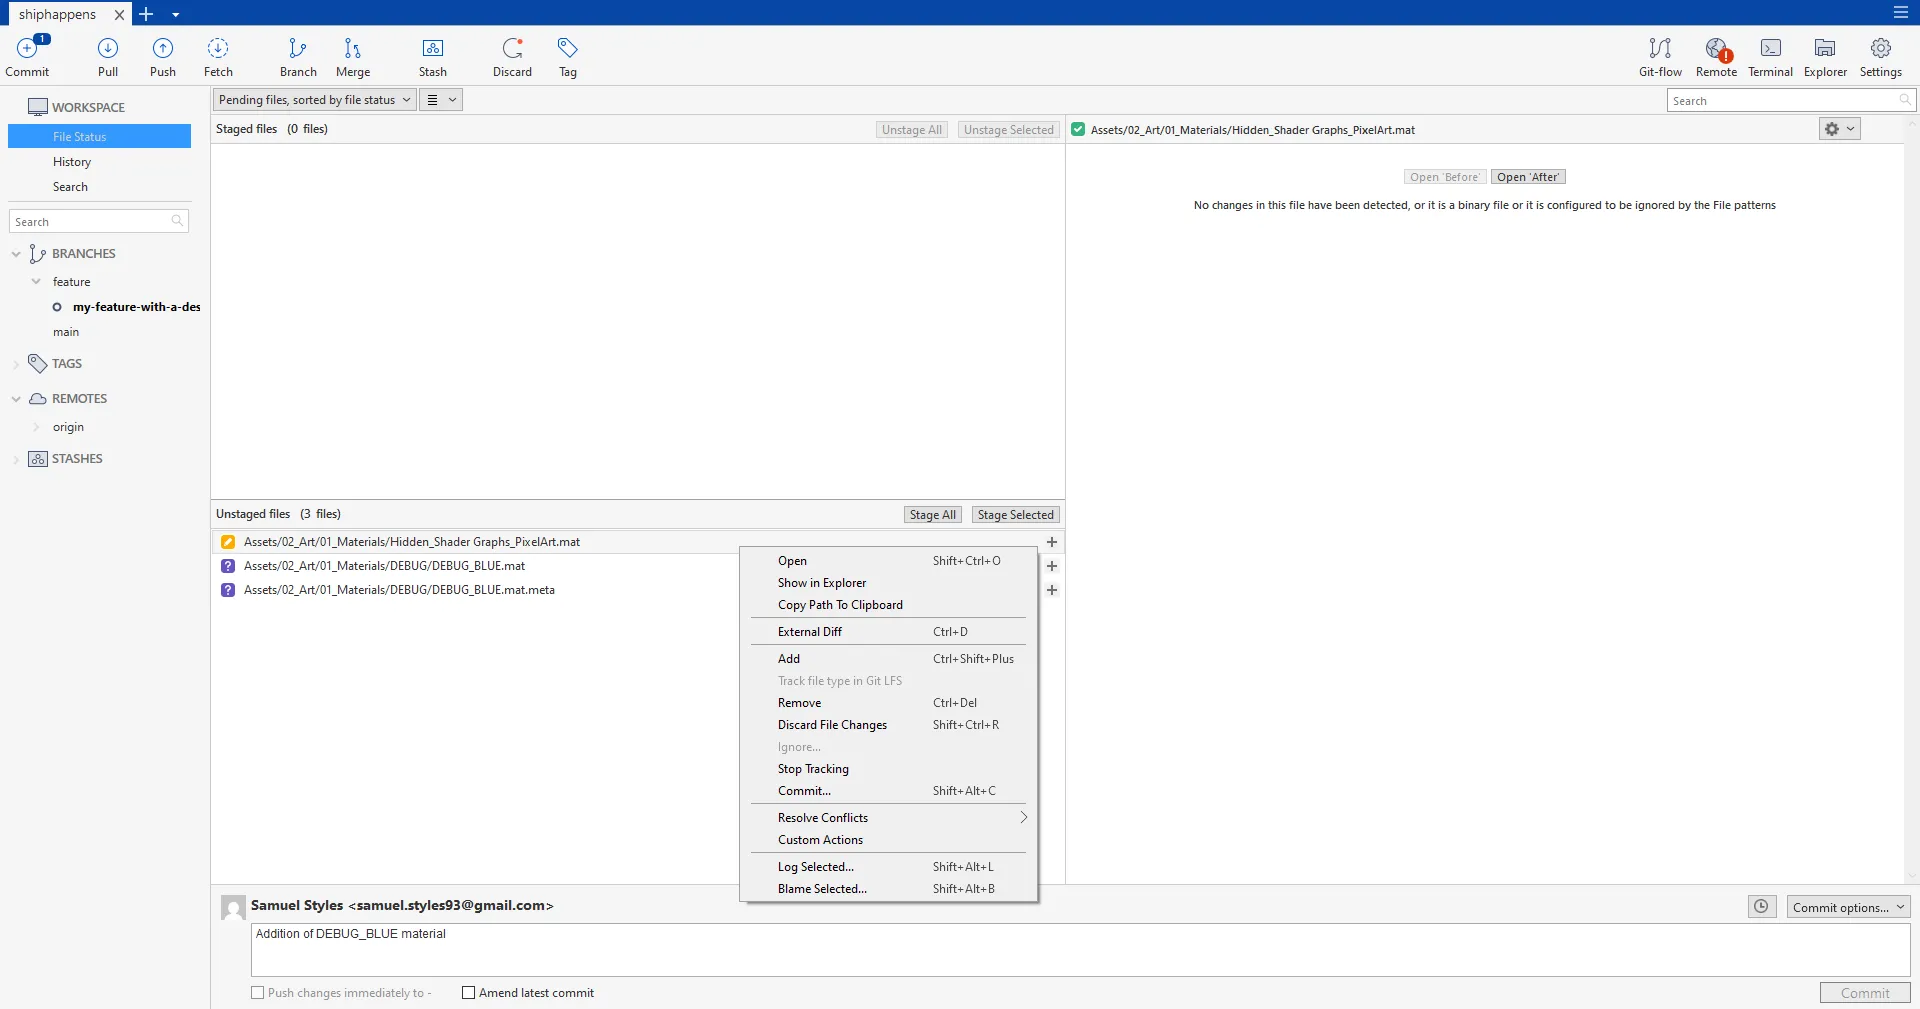
Work on your feature. When you are ready to save a snapshot, switch to the File Status tab in SourceTree.
Stage your changes
The bottom pane shows all modified files split into two areas:
- Unstaged files — changes not yet included in the next commit
- Staged files — changes that will be saved in the next commit
You can:
- Click Stage All to stage every modified file at once
- Stage individual files by selecting them and clicking Stage Selected or using the little [+] sign
- Discard file changes by right-clicking a file → Discard (this permanently reverts the file to its last committed state — use with care)
- Remove a file from the project entirely by right-clicking → Remove
Enter a commit message and commit
Type your commit message in the text box at the bottom. A good message:
- Uses the present tense: “Add”, “Fix”, “Update”
- Describes what changed and, when relevant, why
- Stays under ~70 characters
Click Commit to save the snapshot locally.
Push to remote
Once you have one or more commits ready, click the Push button in the toolbar. Select the remote branch (it will default to the same name as your local branch) and confirm.
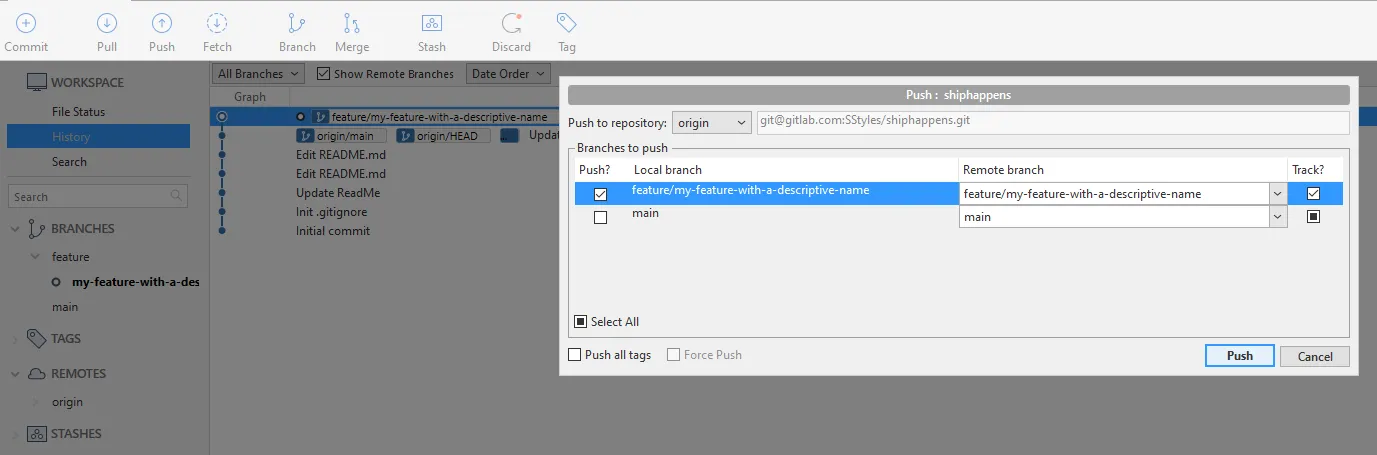
The first push creates the branch on the remote. Subsequent pushes on the same branch require no extra configuration.
3. Create a Merge Request on GitLab
With your branch pushed, open GitLab in your browser and navigate to your project.
Open the Merge Request form
GitLab will usually show a banner at the top: “You pushed…”.
Click [Create Merge Request].

Alternatively go to Merge Requests → New Merge Request, select your source branch and main as the target.
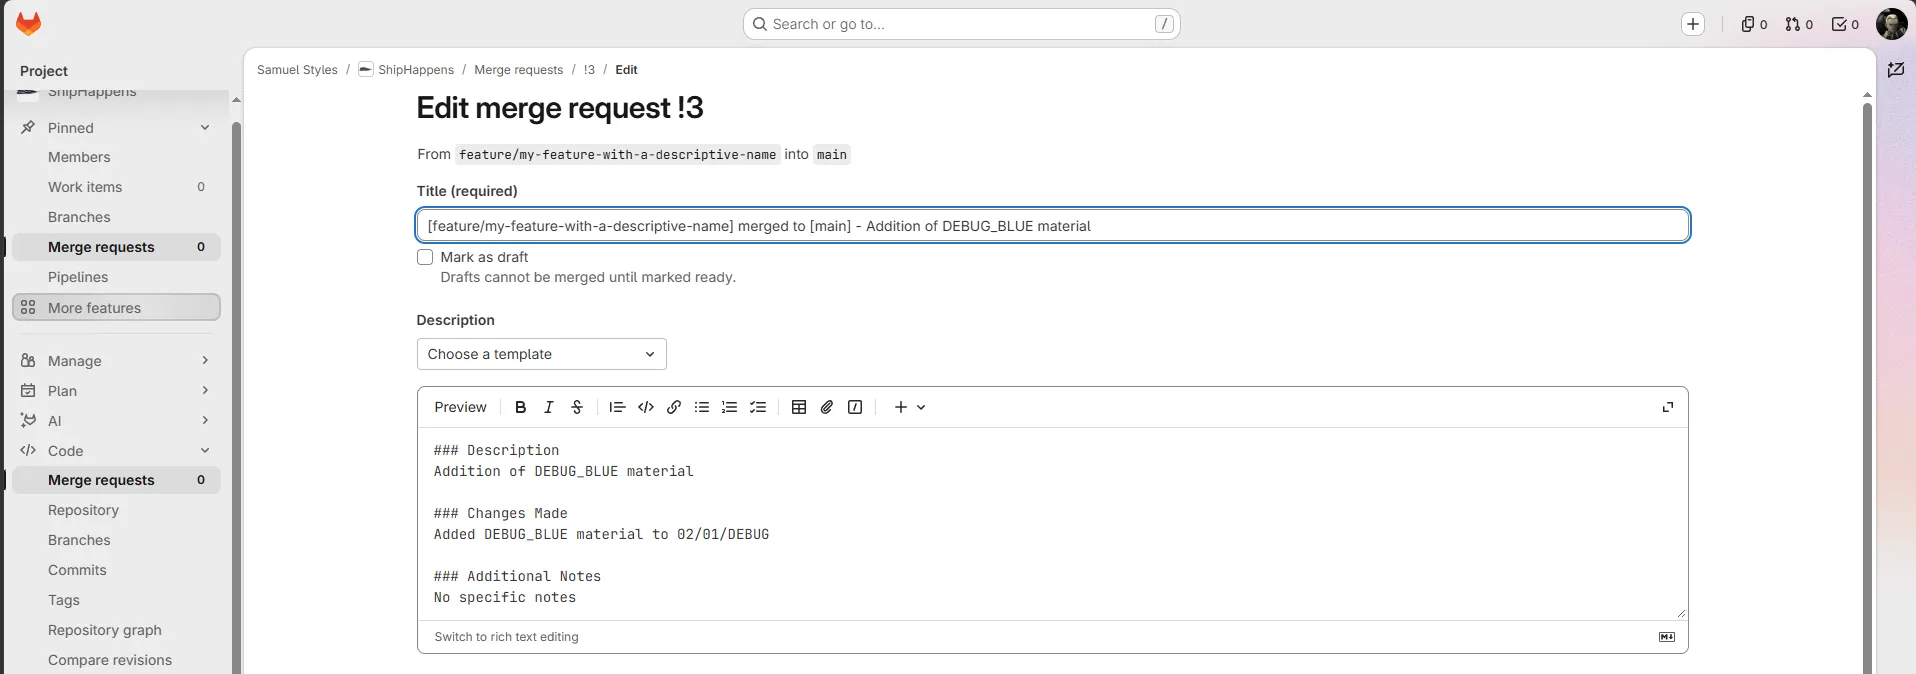
Fill in the description
Give the MR a clear title that mirrors the branch name intent.
For the description, use a template if your project has one configured. It prompts you for the sections reviewers need:
### Description
This merge request addresses, and describe the addition or modification of a feature.
(e.g. Addition of [feature], Update of [feature],...)

### Changes Made
Describe the modification made to the project.
(e.g. Addition of [feature] in folder 00/01/NameOfFolder)

### Additional Notes
Include any extra information or considerations for reviewers.
This can be leaved blank if not specific attention is required.
A well-written description saves reviewers time and avoids back-and-forth.
Set Assignee and Reviewer
- Assignee — the person responsible for the MR
(usually a team lead) - Reviewer — the teammate(s) who will review the code before it merges
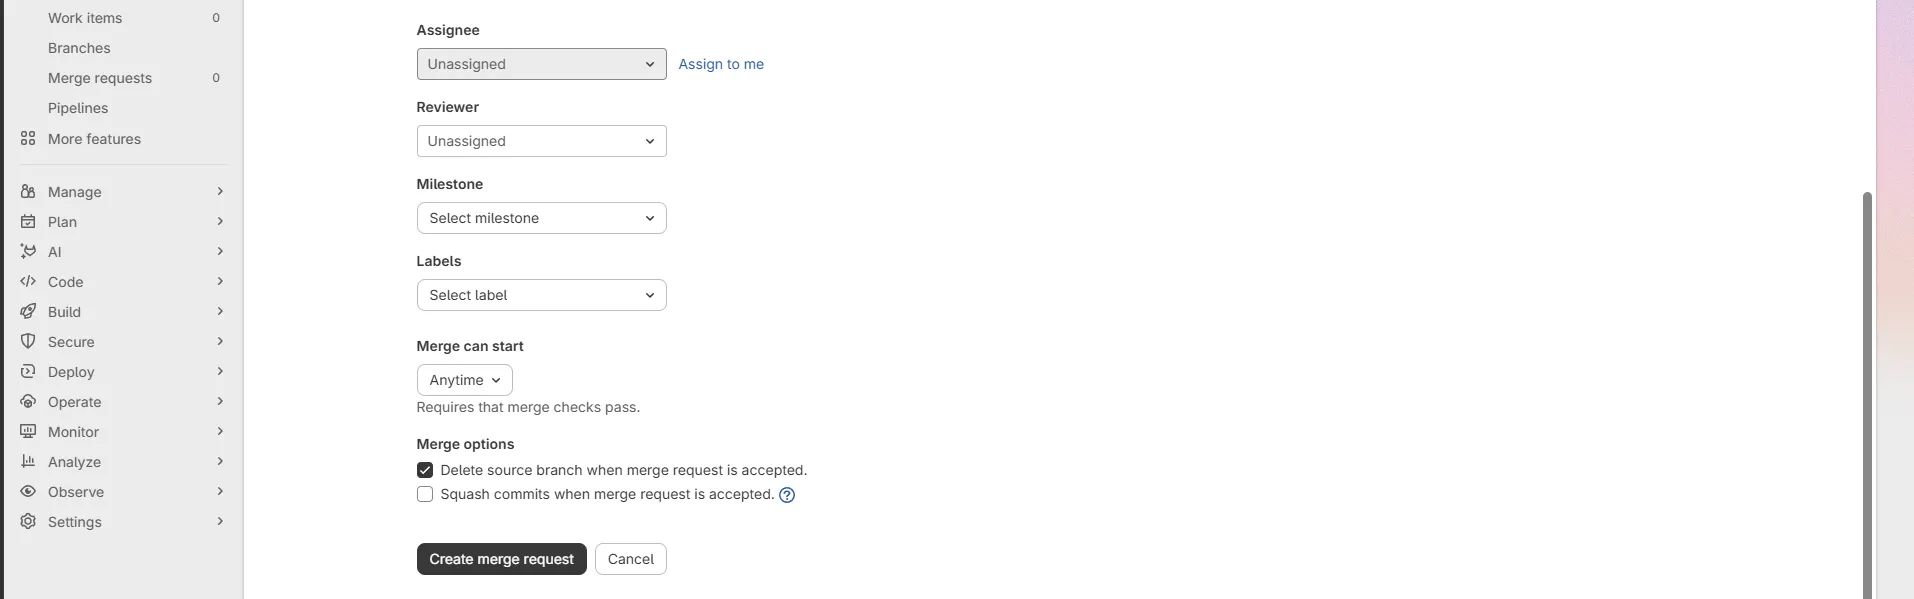
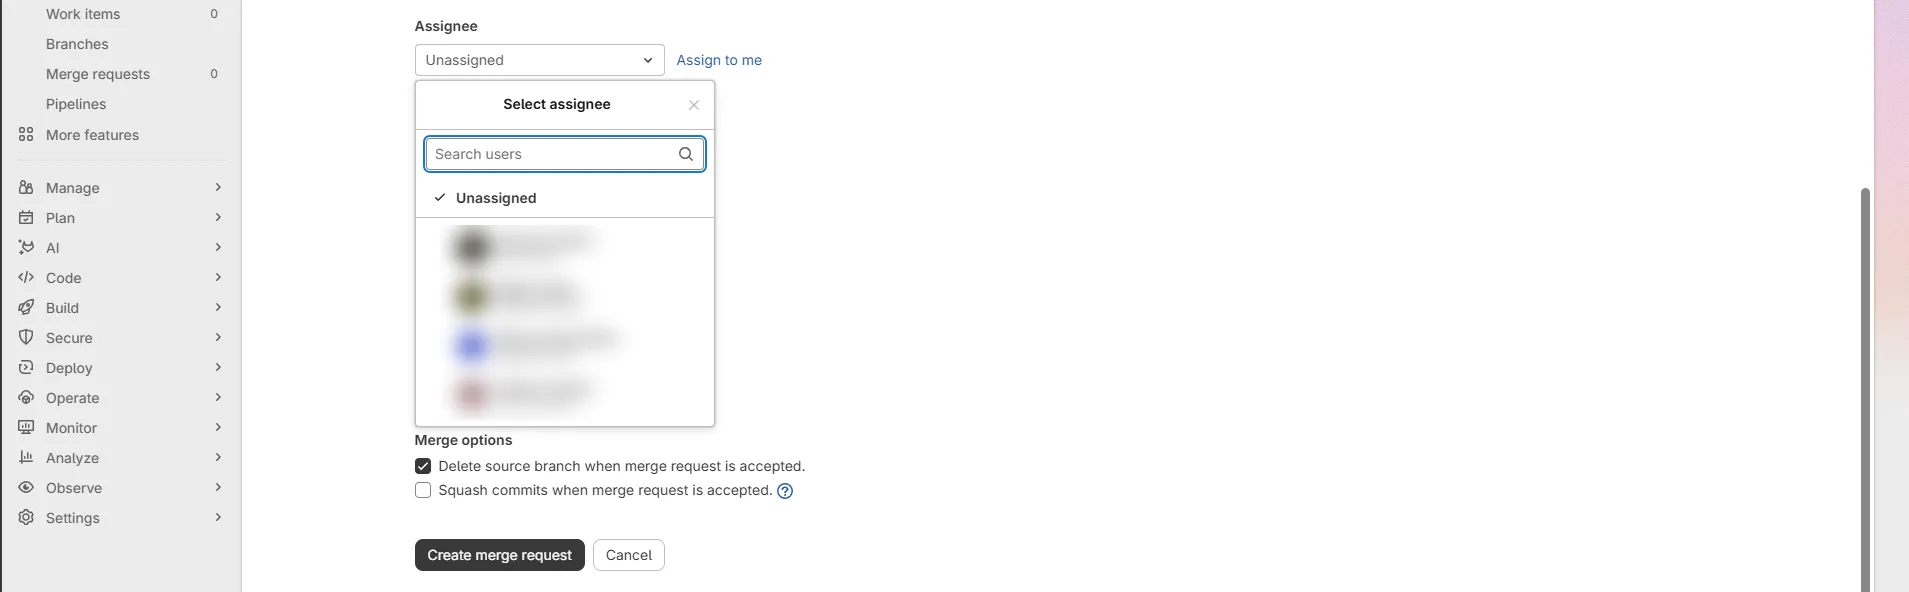
Click Create Merge Request to submit. The assigned reviewers will receive a notification.
4. Reviewer: Approve and Merge
If you are the reviewer, GitLab will notify you by email or in-app notification.
Go to Merge Requests in the GitLab sidebar and click on the MR assigned to you.
Read through the Changes tab — look at the diff, check for correctness, edge cases, and consistency with the project conventions. Leave inline comments if anything needs addressing.
When everything looks good, click Approve to signal your sign-off, then click Merge to merge the branch into main.
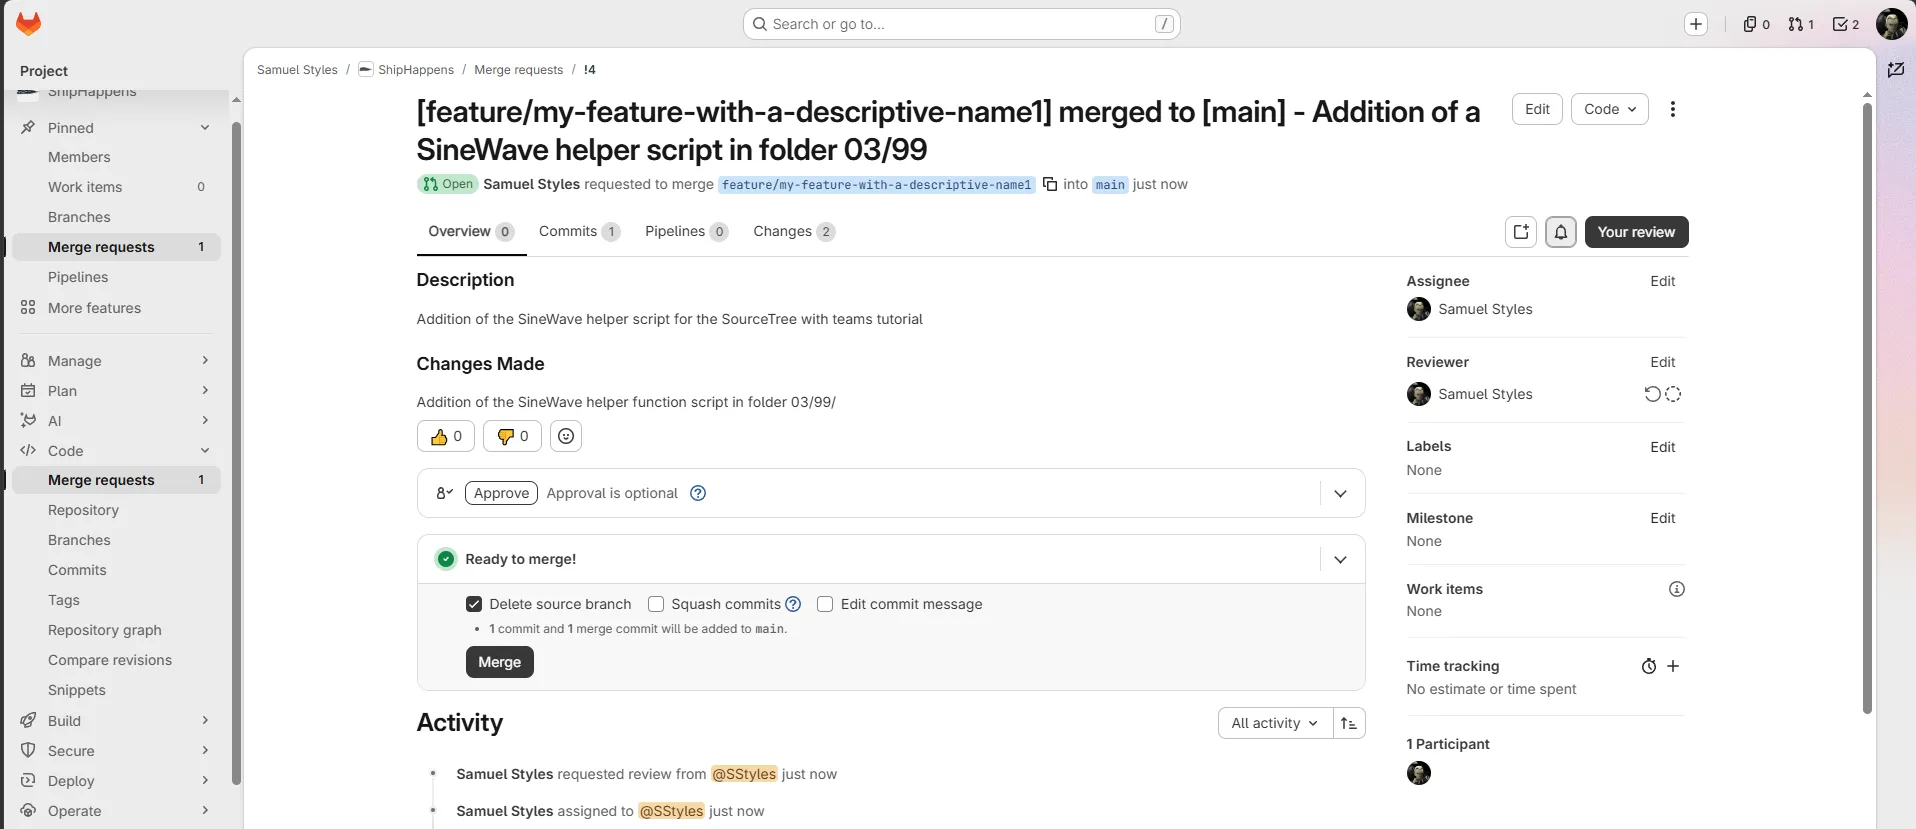
Once merged, the feature branch on the remote is no longer needed. GitLab offers an option to delete the source branch automatically on merge — enable it to keep the remote clean.
5. Clean Up — Delete Branch and Pull main
After the MR is merged, sync your local repository and remove the feature branch.
Pull main
Switch back to main in SourceTree and click Pull to bring in the merge commit.
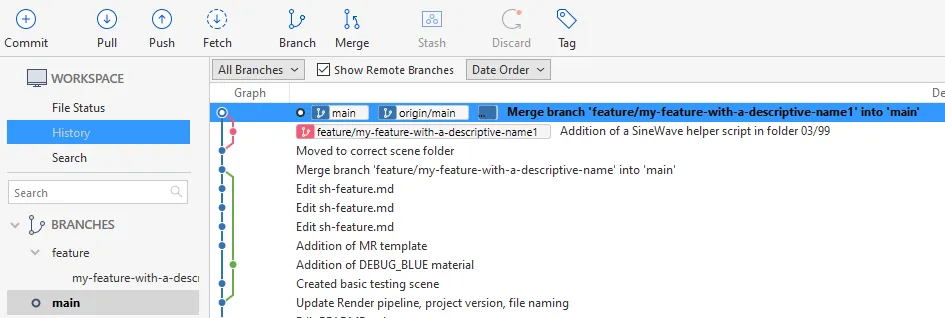
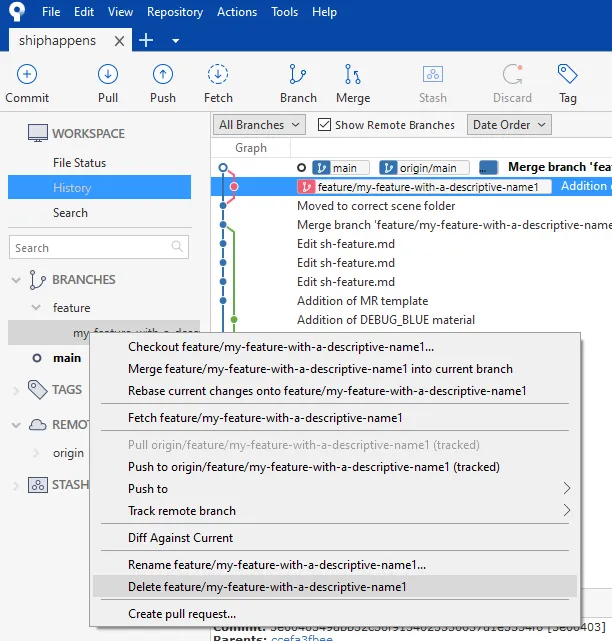
Delete the local branch
In the left sidebar, right-click your feature branch → Delete branch… and confirm.
Optional — Prune tracking branches automatically
If your team deletes branches on the remote after merging, SourceTree can clean up the stale tracking references automatically so you never have to delete them manually.
Go to Repository → Repository Settings → Remotes and enable Prune tracking branches on fetch.
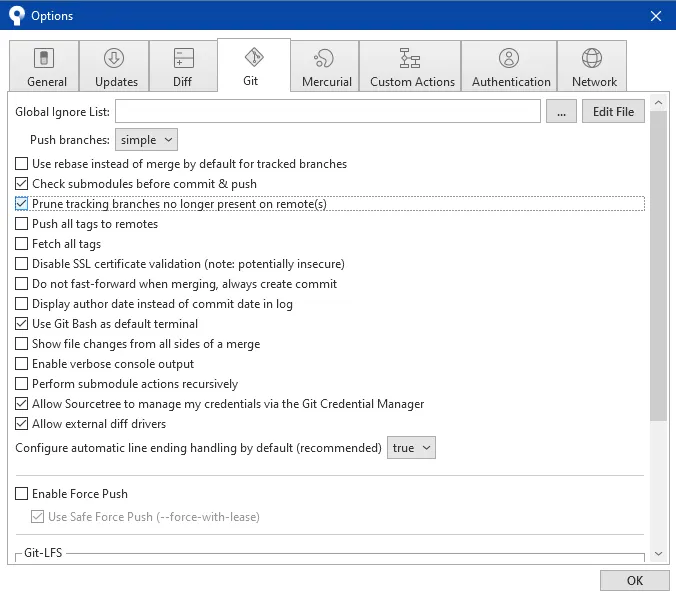
With pruning enabled, every Pull or Fetch removes any local tracking reference for a branch that no longer exists on the remote. You will not have to manually delete origin/feature/my-feature-with-a-descriptive-name after it has been merged and deleted on GitLab.
Summary
| Step | Action | SourceTree / GitLab |
|---|---|---|
| 1 | Pull latest main | SourceTree → Pull |
| 1 | Create feature branch | SourceTree → Branch |
| 2 | Stage, commit, push | SourceTree → File Status → Commit → Push |
| 3 | Open MR, fill description | GitLab → Merge Requests → New |
| 3 | Set assignee and reviewer | GitLab MR form |
| 4 | Review, approve, merge | GitLab → Merge Requests → Merge |
| 5 | Pull main, delete local branch | SourceTree → Pull → Delete branch |
| 5 | (Optional) Enable prune | SourceTree → Repository Settings |