Unity Tips - Creating a Stencil See-Through Effect in Unity 6
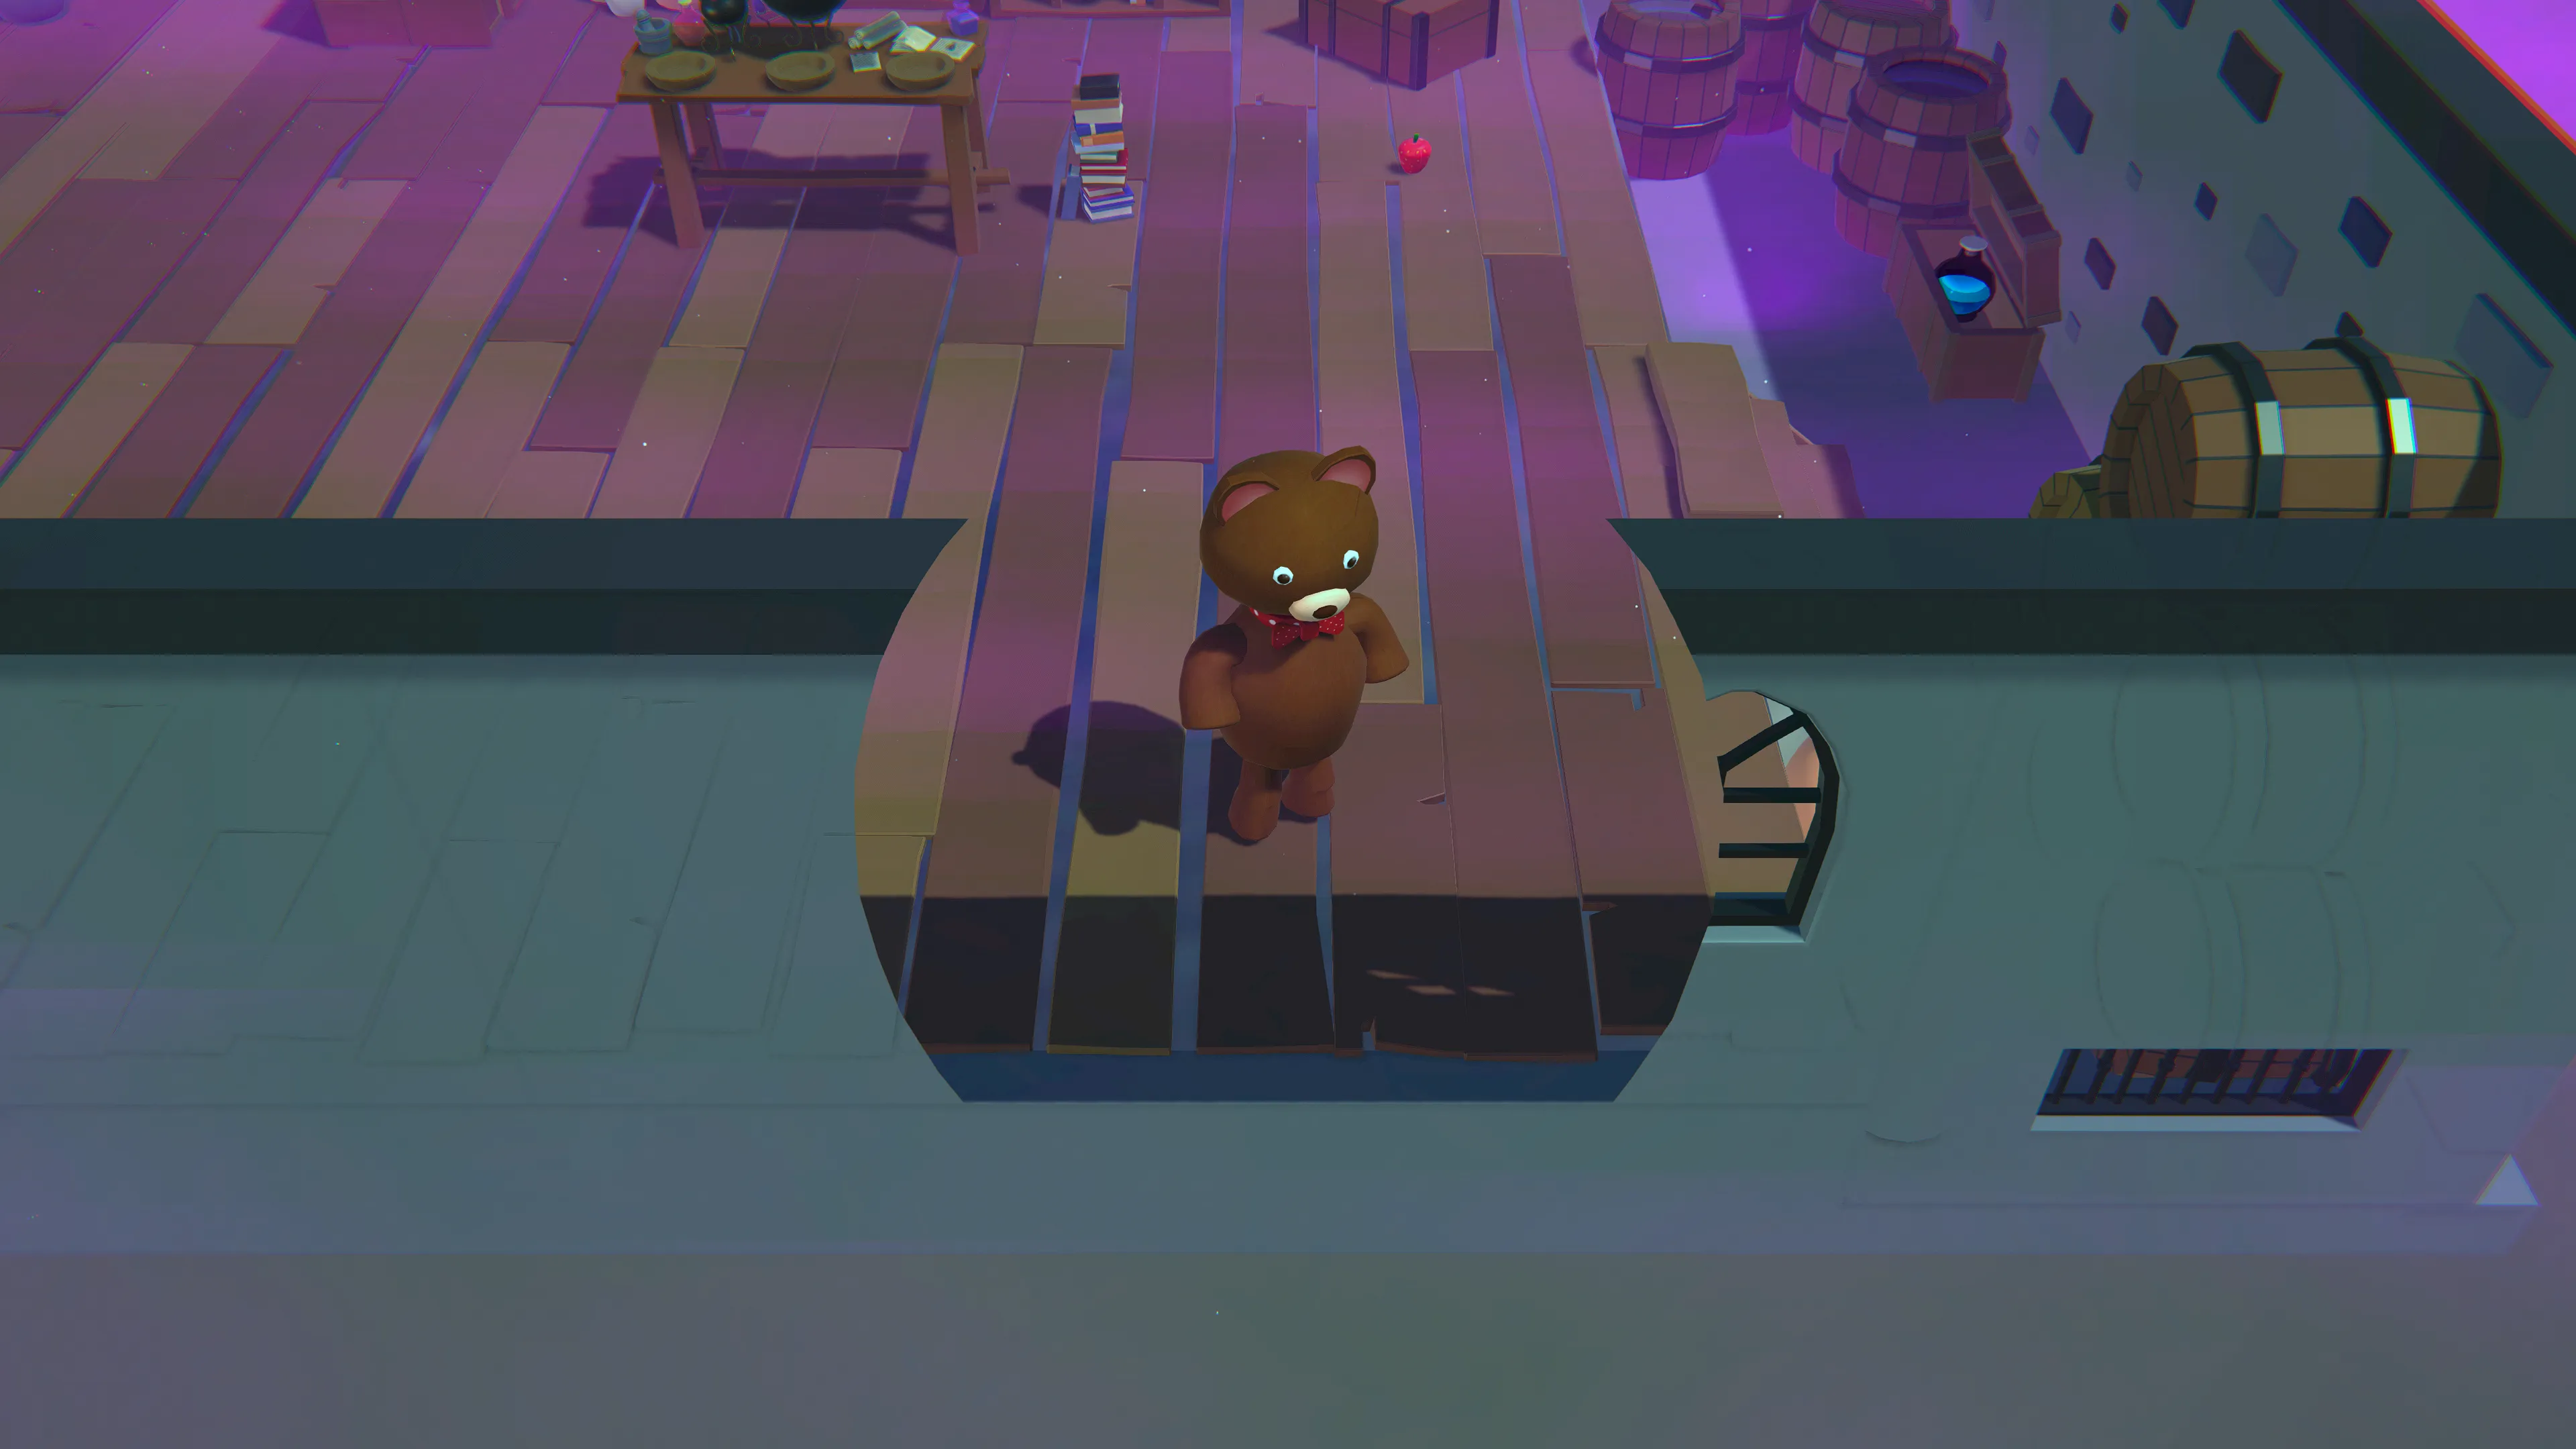
In many top-down or isometric games, walls can obstruct the player’s view of the action.
A common solution is to make obstructing geometry transparent or temporarily cut away when it blocks the line of sight.
In this post, I’ll cover how I implemented a see-through wall system in Unity 6, combining HLSL shaders, URP configuration, and a lightweight C# layer management script.
I’ll also share performance considerations and ideas for extending this technique.
Stencil Setup with HLSL
The core of this effect relies on the stencil buffer.
We define a shader that marks walls in the stencil pass, giving us control over which parts of the geometry should later be rendered differently.
Shader "Unlit/Cutter"
{
    Properties
    {
        [IntRange] _StencilID ("Stencil ID", Range(0,255)) = 0
    }
    SubShader
    {
        Tags { "RenderType"="Opaque" "Queue"="Geometry-1" "RenderPipeline"="UniversalPipeline"}

        Pass
        {
            Blend Zero One
            ZWrite Off

            Stencil
            {
                Ref [_StencilID]
                Comp Always
                Pass Replace
            }
        }
    }
}
This shader doesn’t render visible pixels; it only writes stencil values.
Later, the URP pipeline uses these values to selectively apply transparency.
Configuring the URP Renderer
Next, I extended the URP Asset Renderer.
Two Renderer Features were added:
- Cutter Pass → Applies the stencil writes.

- SeeThrough Pass → Overrides wall rendering when the stencil is active.
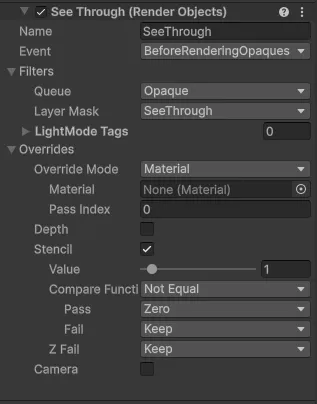
This allows walls to remain fully opaque by default, but become see-through as soon as the script switches their layer.
Runtime Layer Switching
To control which walls become transparent, I wrote a simple C# script. It checks the player’s position relative to wall colliders and assigns them to either the opaque layer or the see-through layer.
void Update()
{
    float playerZ = m_player.transform.position.z;
    float playerY = m_player.transform.position.y;

    foreach (Collider wallCollider in m_wallColliders)
    {
        // Y-axis rule: if the player is above the wall, always keep it opaque
        if (playerY > wallCollider.bounds.max.y - m_playerAboveWallThreshold)
        {
            wallCollider.gameObject.layer = m_opaqueLayer;
            continue;
        }

        // Z-axis rule: if the wall is in front of the player, make it see-through
        if (wallCollider.bounds.min.z < playerZ || wallCollider.bounds.max.z < playerZ)
        {
            wallCollider.gameObject.layer = m_seeThroughLayer;
        }
        else
        {
            wallCollider.gameObject.layer = m_opaqueLayer;
        }
    }
}
This ensures walls in front of the camera fade out, while walls behind or under remain visible.
Player Setup
The final piece of the system is the Cutter object.
In this implementation, it’s a simple sphere attached to the player character and assigned to the Cutter layer.
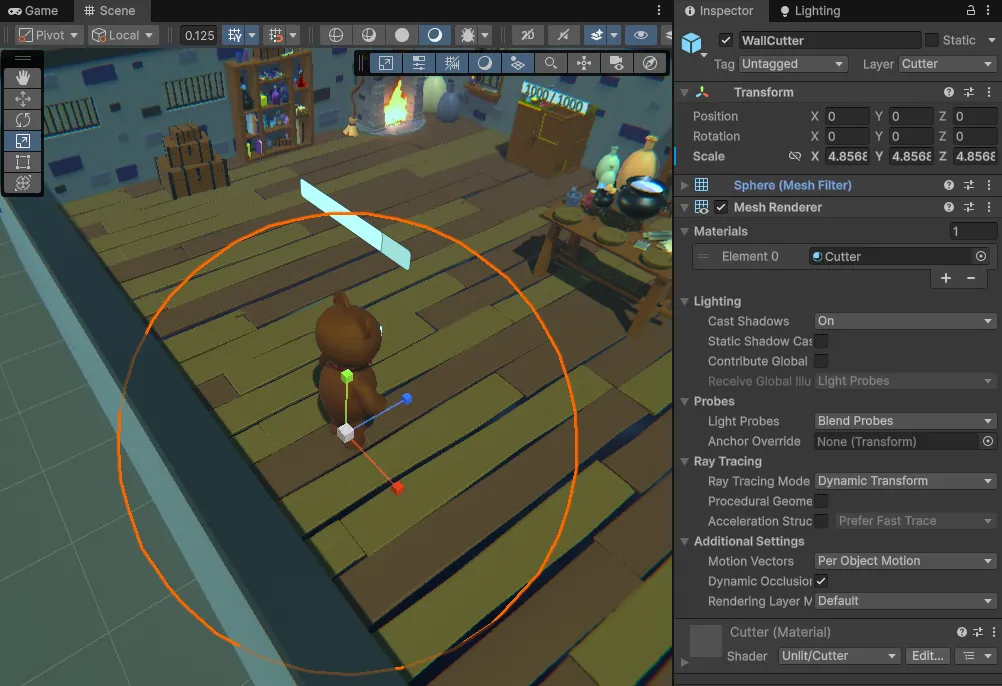
As the player moves, this sphere continuously updates the stencil buffer, ensuring that any obstructing walls are correctly masked out in real time.
Retrospective
Performance Considerations
While this system works well in small to mid-scale levels, there are a few things to watch out for:
- Physics iteration cost → Iterating through many wall colliders in
Update()can become expensive. A spatial partitioning structure (e.g., Physics.OverlapSphere) could reduce checks. - Overdraw → Transparent walls increase GPU overdraw. Using cutout shaders or depth-based dithering could mitigate this if necessary.
- Stencil conflicts → If your project already uses the stencil buffer for UI, outlines, or decals, allocate unique IDs to avoid collisions.
- Batching → Switching layers may break static batching. Consider using material property overrides instead of layers if batching is critical.
Possible Extensions
There are multiple ways this effect could be extended depending on the game’s needs:
- Smooth transitions → Instead of instantly swapping materials, interpolate alpha or use a dithering fade for a cleaner look.
- Multiple players/units → Extend the script to handle visibility relative to multiple characters.
- Line-of-sight system → Instead of relying solely on axis checks, perform raycasts from the camera to the player for more precise occlusion.
- Artist control → Expose thresholds (distance, opacity curve, fade speed) in the inspector so designers can tweak per-level.
Conclusion
This system is relatively lightweight but dramatically improves readability in games where the camera doesn’t follow the player directly. By combining stencil operations, URP renderer features, and runtime logic, we can create a wall-cutting effect that feels seamless to both designers and players.
For production, I’d recommend iterating on the fade mechanics and exploring GPU-based approaches for larger levels—but as a foundation, this approach is flexible, efficient, and easy to extend.