Dynamic Occlusion Cutout System (DOCS) - AlchemisTeddy 🧪🐻
Introduction
After experimenting with a stencil-based see-through effect Unity Tips – Creating a Stencil See-Through Effect in Unity 6, I quickly noticed limitations. In scenarios such as tight tunnels or parallel wall intersections, the stencil solution introduced artifacts and did not feel robust.
For a second attempt, I drew inspiration from Baldur’s Gate III’s beautiful occlusion cutout system.
Luckily, Mojang’s Senior Technical Artist Brendan “Sully” Sullivan had already broken down the technique in Unreal Engine 80.lv article, which served as a strong reference.
The challenge was now clear: How do we reproduce this effect inside Unity?
Step 1 – Defining the Occlusion Radius
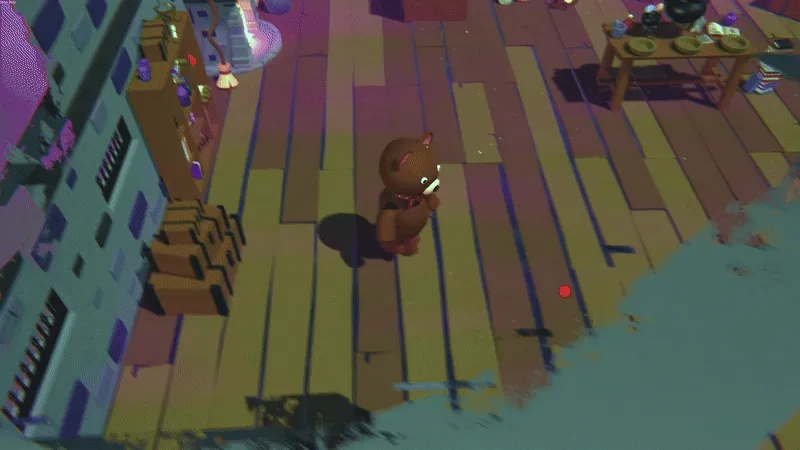
The foundation of the effect is a sphere mask that reveals the player when obstructed by level geometry.
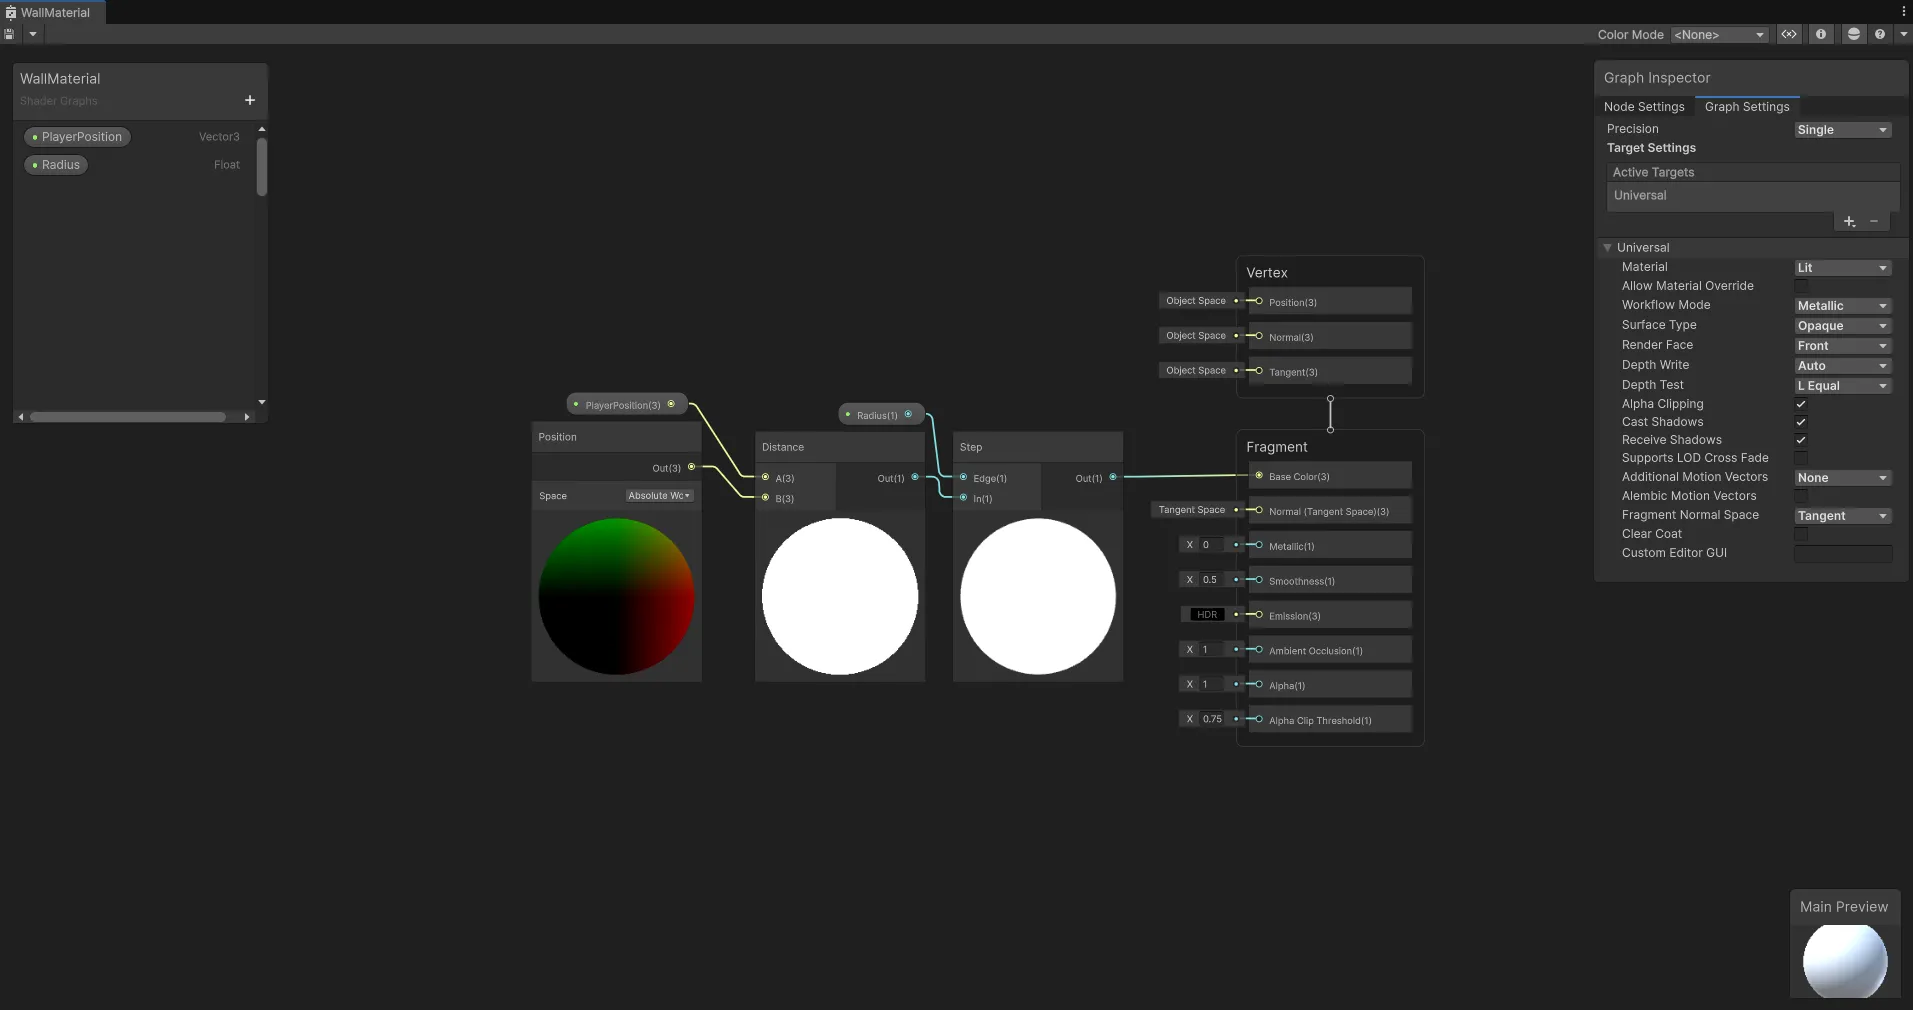
In Shader Graph, I:
- Passed the player position as a Vector3.
- Calculated distance from the current pixel to the player using a
Distance Node. - Applied a
Step Nodeagainst a configurableRadiusproperty.
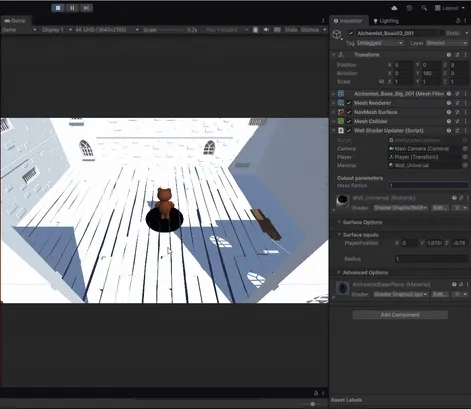
A simple script then sent the player’s world position and the radius value to the shader:
[SerializeField] private Camera m_camera;
[SerializeField] private Transform m_player;
[SerializeField] private Material m_material;

[Header("Cutout Parameters")]
[SerializeField] float maskRadius = 4f;

void Update()
{
    m_material.SetVector("_PlayerPosition", m_player.position);
    m_material.SetFloat("_Radius", maskRadius);
}
Here is the result:
Step 2 – Sphere Casting & Debug Gizmos
Next, the occlusion sphere had to adapt dynamically depending on obstacles between the player and camera.
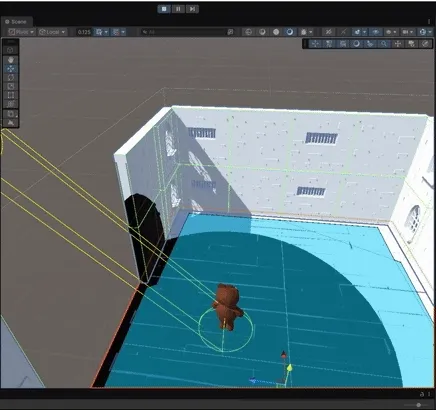
I started with a sphere cast visualization using Gizmos to ensure alignment:
[SerializeField] float radius = 0.5f;
// Update(){ ... }
private void OnDrawGizmosSelected()
{
if (m_player == null) return;
Vector3 origin = m_player.position;
Vector3 dir = m_camera.transform.position - m_player.position;
Vector3 end = m_camera.transform.position;
//Draw start and end spheres
Gizmos.color = Color.yellow;
Gizmos.DrawWireSphere(origin, radius);
Gizmos.DrawWireSphere(end, radius);
//Draw capsule "sides"
Gizmos.DrawLine(origin + Vector3.up * radius, end + Vector3.up * radius);
Gizmos.DrawLine(origin + Vector3.down * radius, end + Vector3.down * radius);
Gizmos.DrawLine(origin + Vector3.right * radius, end + Vector3.right * radius);
Gizmos.DrawLine(origin + Vector3.left * radius, end + Vector3.left * radius);
//If there’s a hit, mark it
if (Physics.SphereCast(origin, radius, dir, out RaycastHit hit, 50.0f))
{
Gizmos.color = Color.red;
Gizmos.DrawWireSphere(hit.point, radius);
}
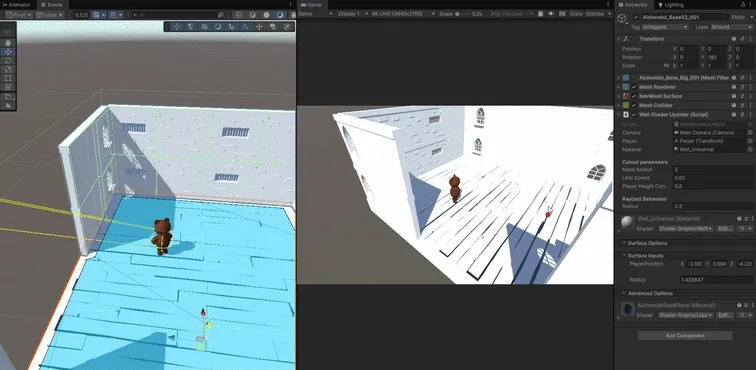
}This gave me accurate feedback on when walls intersected the camera–player line of sight:
Step 3 – Dynamic Sphere & Lerp
With the hit detection in place, I refined the sphere’s position and radius using lerping for smooth transitions.
Key points:
- Sphere is anchored either to the hit point or the player position.
- Mask radius expands/contracts smoothly.
- Height correction factor aligns the effect with the character model.
Then, the real cast had to be done adding a Lerp on wall hit for the sphere position and the raduis, the entire script looks like this:
public class WallShaderUpdater : MonoBehaviour
{
    [SerializeField] private Camera m_camera;
    [SerializeField] public Transform m_player;
    [SerializeField] private Material m_material;

    [Header("Cutout parameters")]
    [SerializeField] float maskRadius = 4f;
    [SerializeField] float lerpSpeed = 0.02f;
    [SerializeField] float playerHeightCorrection = 0.8f;

    [Header("Raycast Behaviour")]
    [SerializeField] float radius = 0.5f;

    Vector3 direction;
    Vector3 currentSpherePosition;
    Vector3 targetPosition;
    private float currentMaskRadius = 0.0f;
    private float targetMaskRadius = 0.0f;
    private float currentLerpTime = 0.0f;
    bool isHitting = false;

    void Update()
    {
        // Correct player position with height value
        Vector3 playerPosition = m_player.position + (Vector3.up * playerHeightCorrection);
        // Get player -> camera vector direction
        direction = m_camera.transform.position - playerPosition;
        // Perform Sphere cast from player to camera
        if (Physics.SphereCast(playerPosition, radius, direction, out RaycastHit hitInfo))
        {
            // Cast hits a wall
            if (!isHitting)
            {
                // Reset LerpTime
                currentLerpTime = 0.0f;
                isHitting = true;
            }
            // Set the targeted position & mask radius
            targetPosition = hitInfo.point;
            targetMaskRadius = maskRadius;
        }
        else
        {
            //No hit
            if (isHitting)
            {
                currentLerpTime = 0.0f;
                isHitting = false;
            }
            targetPosition = playerPosition;
            targetMaskRadius = 0.0f;
        }

        // Lerp value
        if (currentLerpTime < 1.0f) currentLerpTime += Time.deltaTime * lerpSpeed;
        // Apply value to Sphere & Mask radius
        currentSpherePosition = Vector3.Lerp(currentSpherePosition, targetPosition, currentLerpTime);
        currentMaskRadius = Mathf.Lerp(currentMaskRadius, targetMaskRadius, lerpSpeed);

        // Send Sphere/Player position to material
        m_material.SetVector("_PlayerPosition", currentSpherePosition);
        m_material.SetFloat("_Radius", currentMaskRadius);
    }

    /* private void OnDrawGizmosSelected()
    { ... Gizmo Content ..}*/
}
The result is the following:
Step 4 – Shader Improvements
The initial alpha cutout masked everything within the sphere radius, which wasn’t correct. The effect should only remove geometry between the camera and player, not all around them.
To fix this, I:
- Calculated player–camera and pixel–camera vectors.
- Used dot products to test whether a fragment lies between both.
- Adjusted the radius calculation.
- Applied a triplanar mask texture on top of the effect.
Finally, I reconnected the material’s Base Map, Metallic Map, and Emission Map to preserve the original surface properties.
Conclusion
By combining sphere casting, shader masking, and dot-product filtering, I successfully replicated the Baldur’s Gate III occlusion cutout effect in Unity.
This system is now also available through PixelPulse for developers who want to save time implementing the technique in their own projects.